Papercraft4 3D
- Категория: Graphics & Design
- Дата выхода: 2015-08-15
- Текущая версия: 4.1
- Adult рейтинг: 4+
- Размер файла: 83.82 MB
- Разработчик: Aleksandr Varaksa
- Совместимость: Требуется iOS 10.10 или выше.
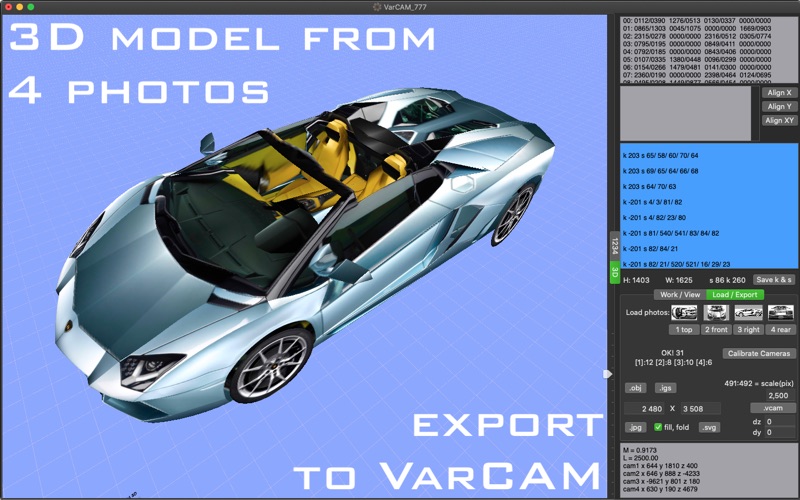
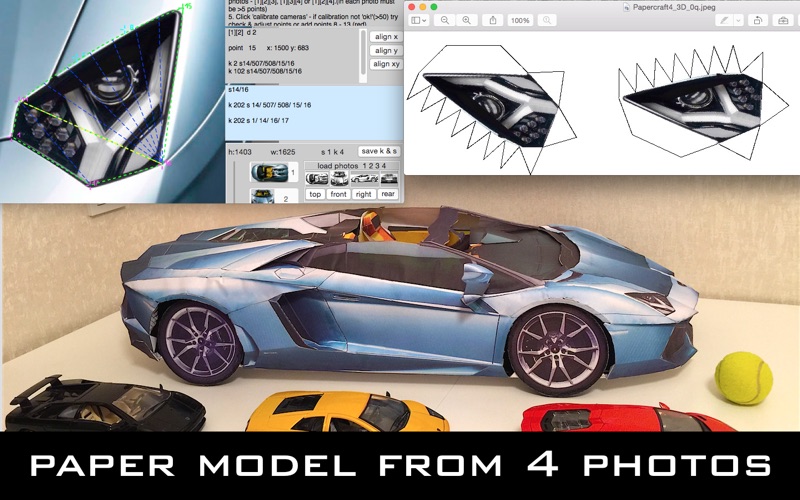
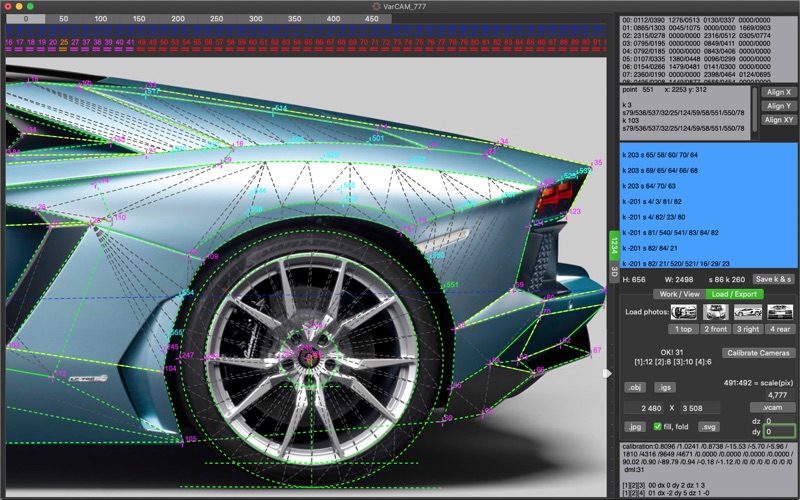
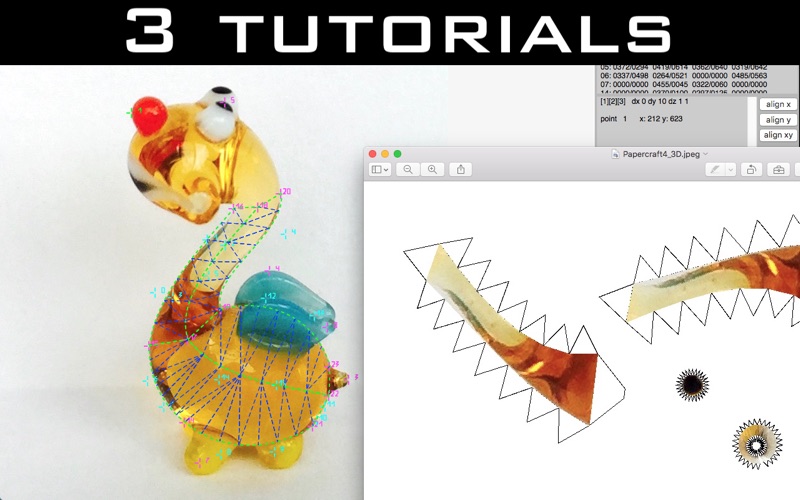
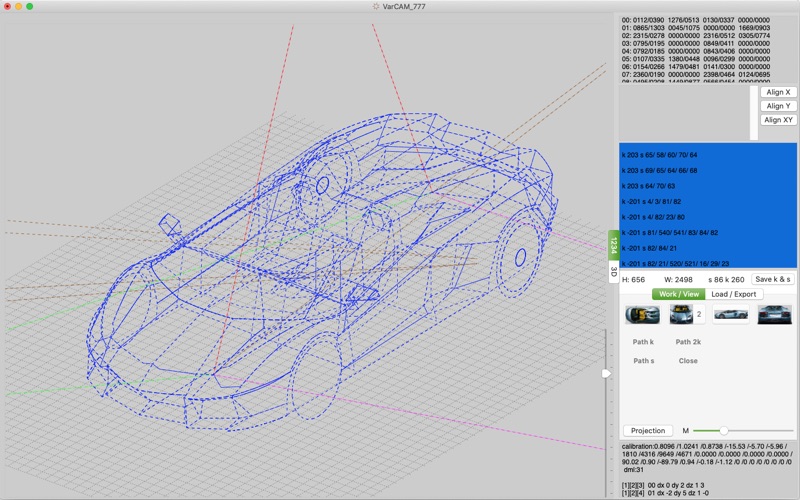
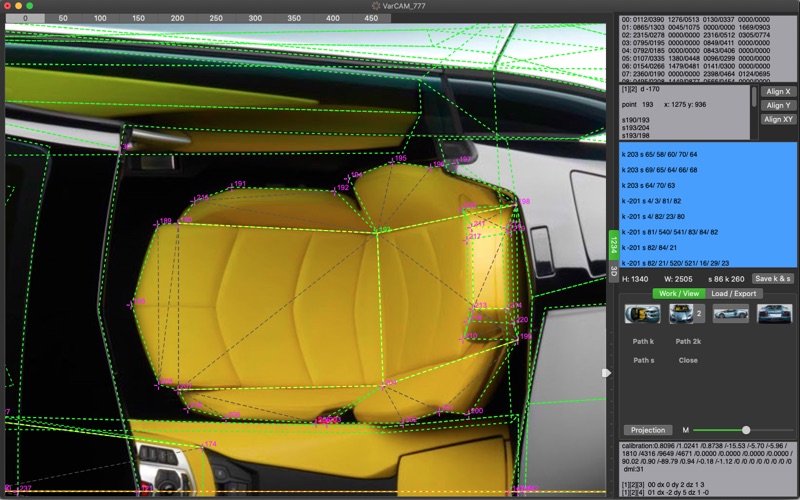
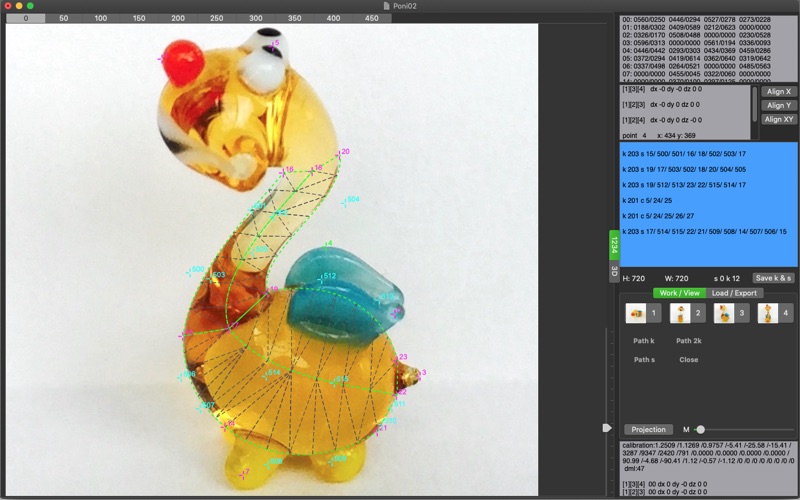
"Only 4 photos & Your dream is in Your hands” "Papercraft4 3D” - convert 4 photos directly into textured 3D model (.obj format) , textured "paper model" prints or IGES format (NURBS surfaces) to use in CAD/CAM CNC and 3D printer. You can see "Papercraft4 3D" trailer & tutorial on YouTube or on support website. Macworld: https://bit.ly/2NzfMkW 1. Name and save project in text file. 2. Load 4 photos: top, front, right, rear. 3. Set base point 0 (red) in each of 4 photos. 4. Set points 1-7 (red) - each must be at least in 3 of 4 photos - [1][2][3], [1][3][4] or [1][2][4].(in each photo must be >5 points) 5. Click 'calibrate cameras' - if calibration not 'ok!'(>50) try check & adjust points or add points 8 - 13 (red). 6. If Your model is symmetrically set symmetry line with 498,499 (red) points in [1][2][4] photos. 7. Set points 14 (red),15,16...(each must be at least in 2 of 4 photos) 8. Set edges of parts by typing text in blue pad: ' k2s3/7/15 ' is meaning triangle of points 3,7,15 cut from [2] photo (points must be typed in clockwise direction) ' k102s3/7/15 ' is meaning symmetrycal part ' k202s3/7/15 ' is meaning both original & symmetrycal parts ' k-2s3/7/15 ' is meaning original part cutted from symmetrically side of photo ' k2s3/501/502/7/15 ' is meaning part with cubic spline (controlPoint1:501 controlPoint2:502) 502 = point 2 (blue), 607 = point 107 (blue). ' s4/6 ' is meaning merging two parts, containing points 4 and 6, in one. "circle" ' k2c1/2/3 ' is meaning circle with centre in point 1, radius #1 in point 2, radius #2 in point 3 cut from [2] photo ' k2c1/2/3/4/5 ' is meaning ring sequential to circle with centre in point 4, radius #1 in point 5 (point 4 can be in one picture) ' k2c1/2/3/4/5/6/7 ' is meaning ring sequential to ring sequential to circle with centre in point 6, radius #1 in point 7 (point 6 can be in one picture) etc 9. After typing, click 'save k & s'. • Now to set edges of parts instead of typing "k2s 1/2/3" simply tap button "path k" and select points in clockwise direction, then tap "close". 10. Click '.jpg' or '.svg' and save for printing model parts or click '.obj' and save .mtl and .obj files (textures for model same as source 4 photos). Click '.igs' and save IGES format (NURBS surfaces) for use in CAD/CAM CNC and 3D printer. One part can include max. 100 points (21 points for circle) . One model can include max. 500 parts. If you see [x][x] or [x][x][x] in point info pad you can try 'auto align x or y' position of point.(in some cases it may be helpful) Size of photos = any of (100 .. 7000)x(100 .. 7000) , but scale of photos [2],[3],[4] to photo [1] must be (x0.1 .. x1.9). Exported jpeg or svg files is 2480 x 3508 pixels (max 9933 x 14043). If set 491 and 492 point you can change size of model ('2500'= 1000 - 5000)